> ## Documentation Index
> Fetch the complete documentation index at: https://docs.a1base.com/llms.txt
> Use this file to discover all available pages before exploring further.
# Receiving Emails
> Receive incoming emails through webhooks
A1Base can forward incoming emails to your application via webhooks. When an email is received at your A1Base email address, we'll send a POST request to your configured webhook URL with the email details.
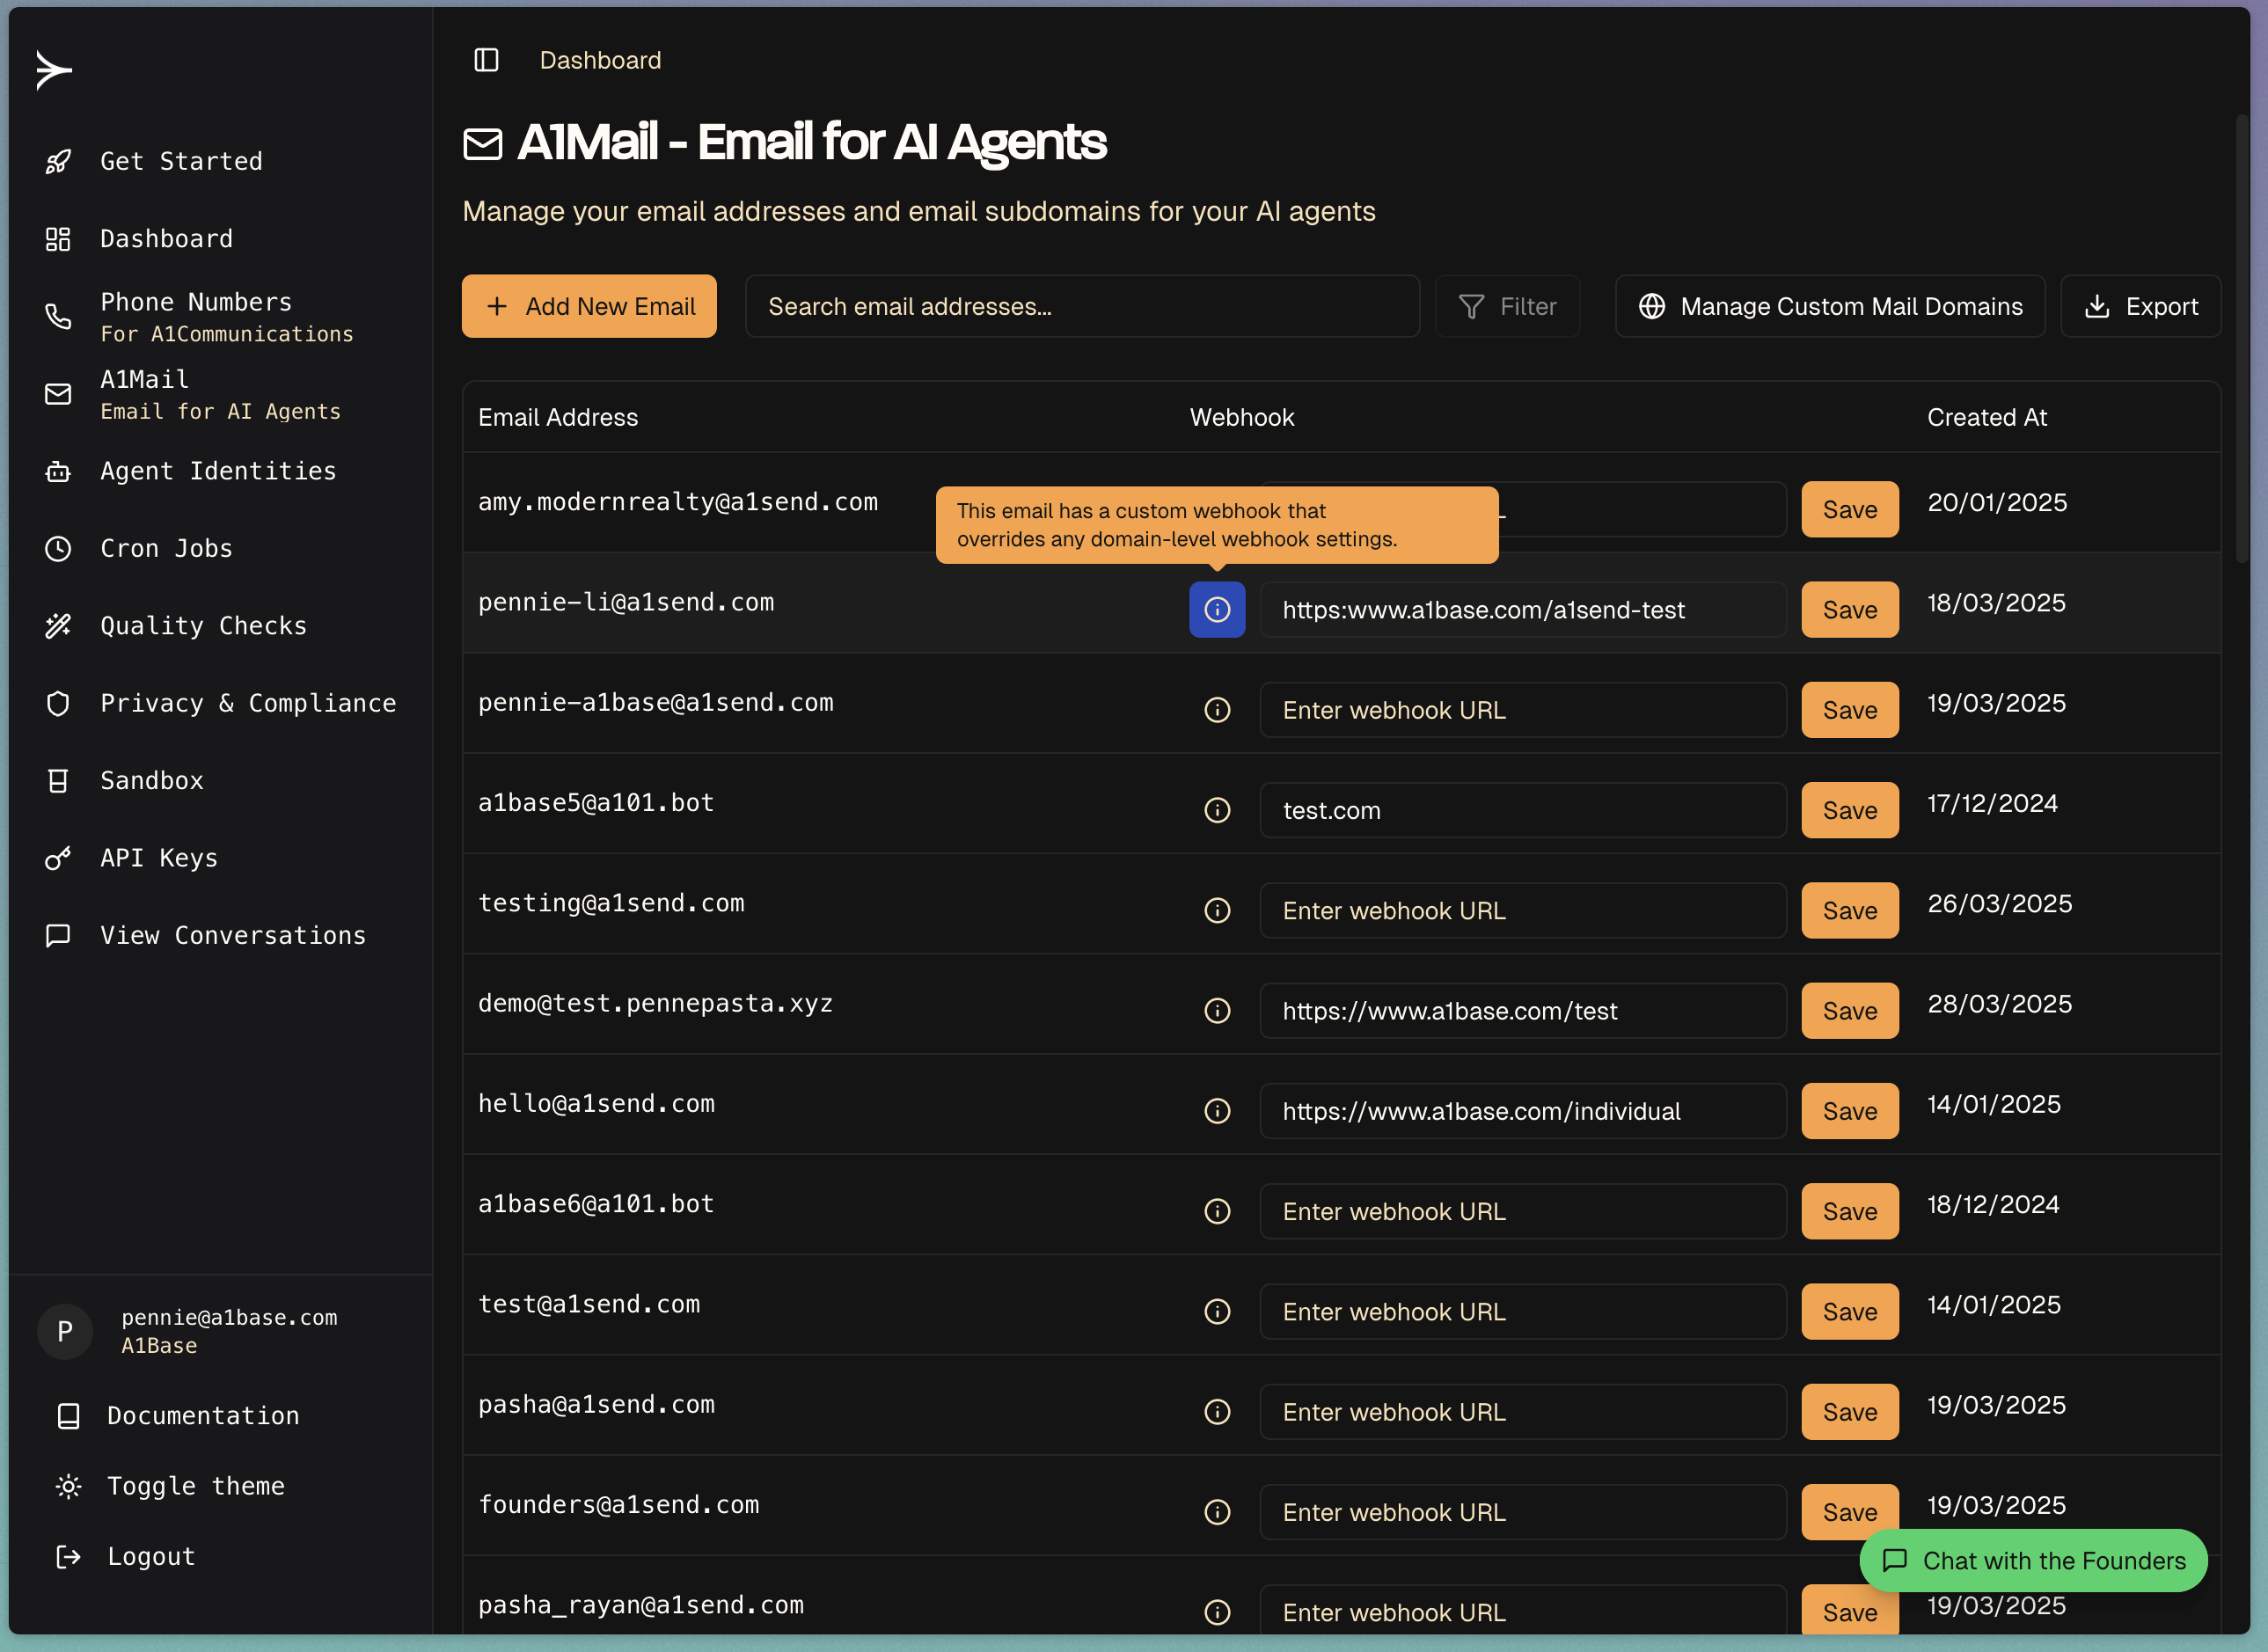
You can configure your webhook on the [email dashboard here](https://www.a1base.com/dashboard/email-addresses)
⏰ Estimated setup time: 10min.
### In this guide you will:
### 1. Setup a webhook endpoint in your app
* Create a simple endpoint to receive email webhooks
* Use ngrok to expose your local endpoint to the internet
### 2. Configure webhook URL in A1Mail dashboard
* Go to the [email dashboard](https://www.a1base.com/dashboard/email-addresses)
* Add your ngrok webhook URL to your A1Mail Dashboard
### 3. Test receiving emails
* Send a test email from your personal email address to your A1Mail inbox
* View the incoming email data in your webhook endpoint
* Parse and process the email contents as needed
## 1. Create a Webhook Endpoint
First, create an endpoint in your application to receive email notifications. You can use one of our example snippets below or create your own.
```python theme={null}
from flask import Flask, request, jsonify
app = Flask(__name__)
@app.route('/webhook/email', methods=['POST'])
def email_webhook():
# Get the webhook payload
data = request.json
# Process the incoming email
print(f"Received email: {data['subject']} from {data['sender_address']}")
# Access specific parts of the email
email_id = data.get('email_id')
subject = data.get('subject')
sender = data.get('sender_address')
recipient = data.get('recipient_address')
timestamp = data.get('timestamp')
raw_email = data.get('raw_email_data')
# Your logic here
# ...
# Return a success response
return jsonify({"status": "success"}), 200
if __name__ == '__main__':
app.run(debug=True, port=5000)
```
```javascript theme={null}
const express = require('express');
const app = express();
app.use(express.json());
app.post('/webhook/email', (req, res) => {
// Get the webhook payload
const data = req.body;
// Process the incoming email
console.log(`Received email: ${data.subject} from ${data.sender_address}`);
// Access specific parts of the email
const emailId = data.email_id;
const subject = data.subject;
const sender = data.sender_address;
const recipient = data.recipient_address;
const timestamp = data.timestamp;
const rawEmail = data.raw_email_data;
// Your logic here
// ...
// Return a success response
res.status(200).json({ status: 'success' });
});
app.listen(3000, () => {
console.log('Server listening on port 3000');
});
```
```javascript theme={null}
// Simple vanilla JavaScript webhook handler
// Can be used with any JavaScript framework or serverless function
async function handleEmailWebhook(request) {
try {
// Parse the incoming JSON payload
const data = await request.json();
console.log(`Received email: ${data.subject} from ${data.sender_address}`);
// Process email data
const {
email_id,
subject,
sender_address,
recipient_address,
timestamp,
service,
raw_email_data
} = data;
// Your logic here
// ...
// Return a success response
return new Response(JSON.stringify({ status: 'success' }), {
status: 200,
headers: { 'Content-Type': 'application/json' }
});
} catch (error) {
console.error('Error processing webhook:', error);
return new Response(JSON.stringify({ status: 'error', message: error.message }), {
status: 500,
headers: { 'Content-Type': 'application/json' }
});
}
}
```
## 2. Expose Your Local Webhook Endpoint
To receive emails in your inbox, you need to expose your local webhook endpoint to the internet. You can use ngrok to do this.
Run the following command in your CLI to start ngrok:
```bash theme={null}
ngrok http 3000
```
After starting ngrok
1. **Find the forwarding URL** in the ngrok output:
```
Forwarding https://0fcbcda91e79.ngrok.app -> http://localhost:3000
```
2. **Create the full webhook URL** by appending your webhook endpoint path:
```
https://0fcbcda91e79.ngrok.app/webhook/email
```
3. **Use this complete URL** in the A1Mail dashboard webhook settings.
## 3. Register Your Webhook in the Dashboard
Once you have your webhook URL, you need to register it in the A1Mail dashboard:
1. Log in to your [A1Base Dashboard](https://www.a1base.com/)
2. Navigate to the Email Settings section
3. Find your email address and click "Configure Webhook"
4. Enter your full webhook URL (e.g., `https://0fcbcda91e79.ngrok.app/webhook/email`)
5. Click "Save Changes"
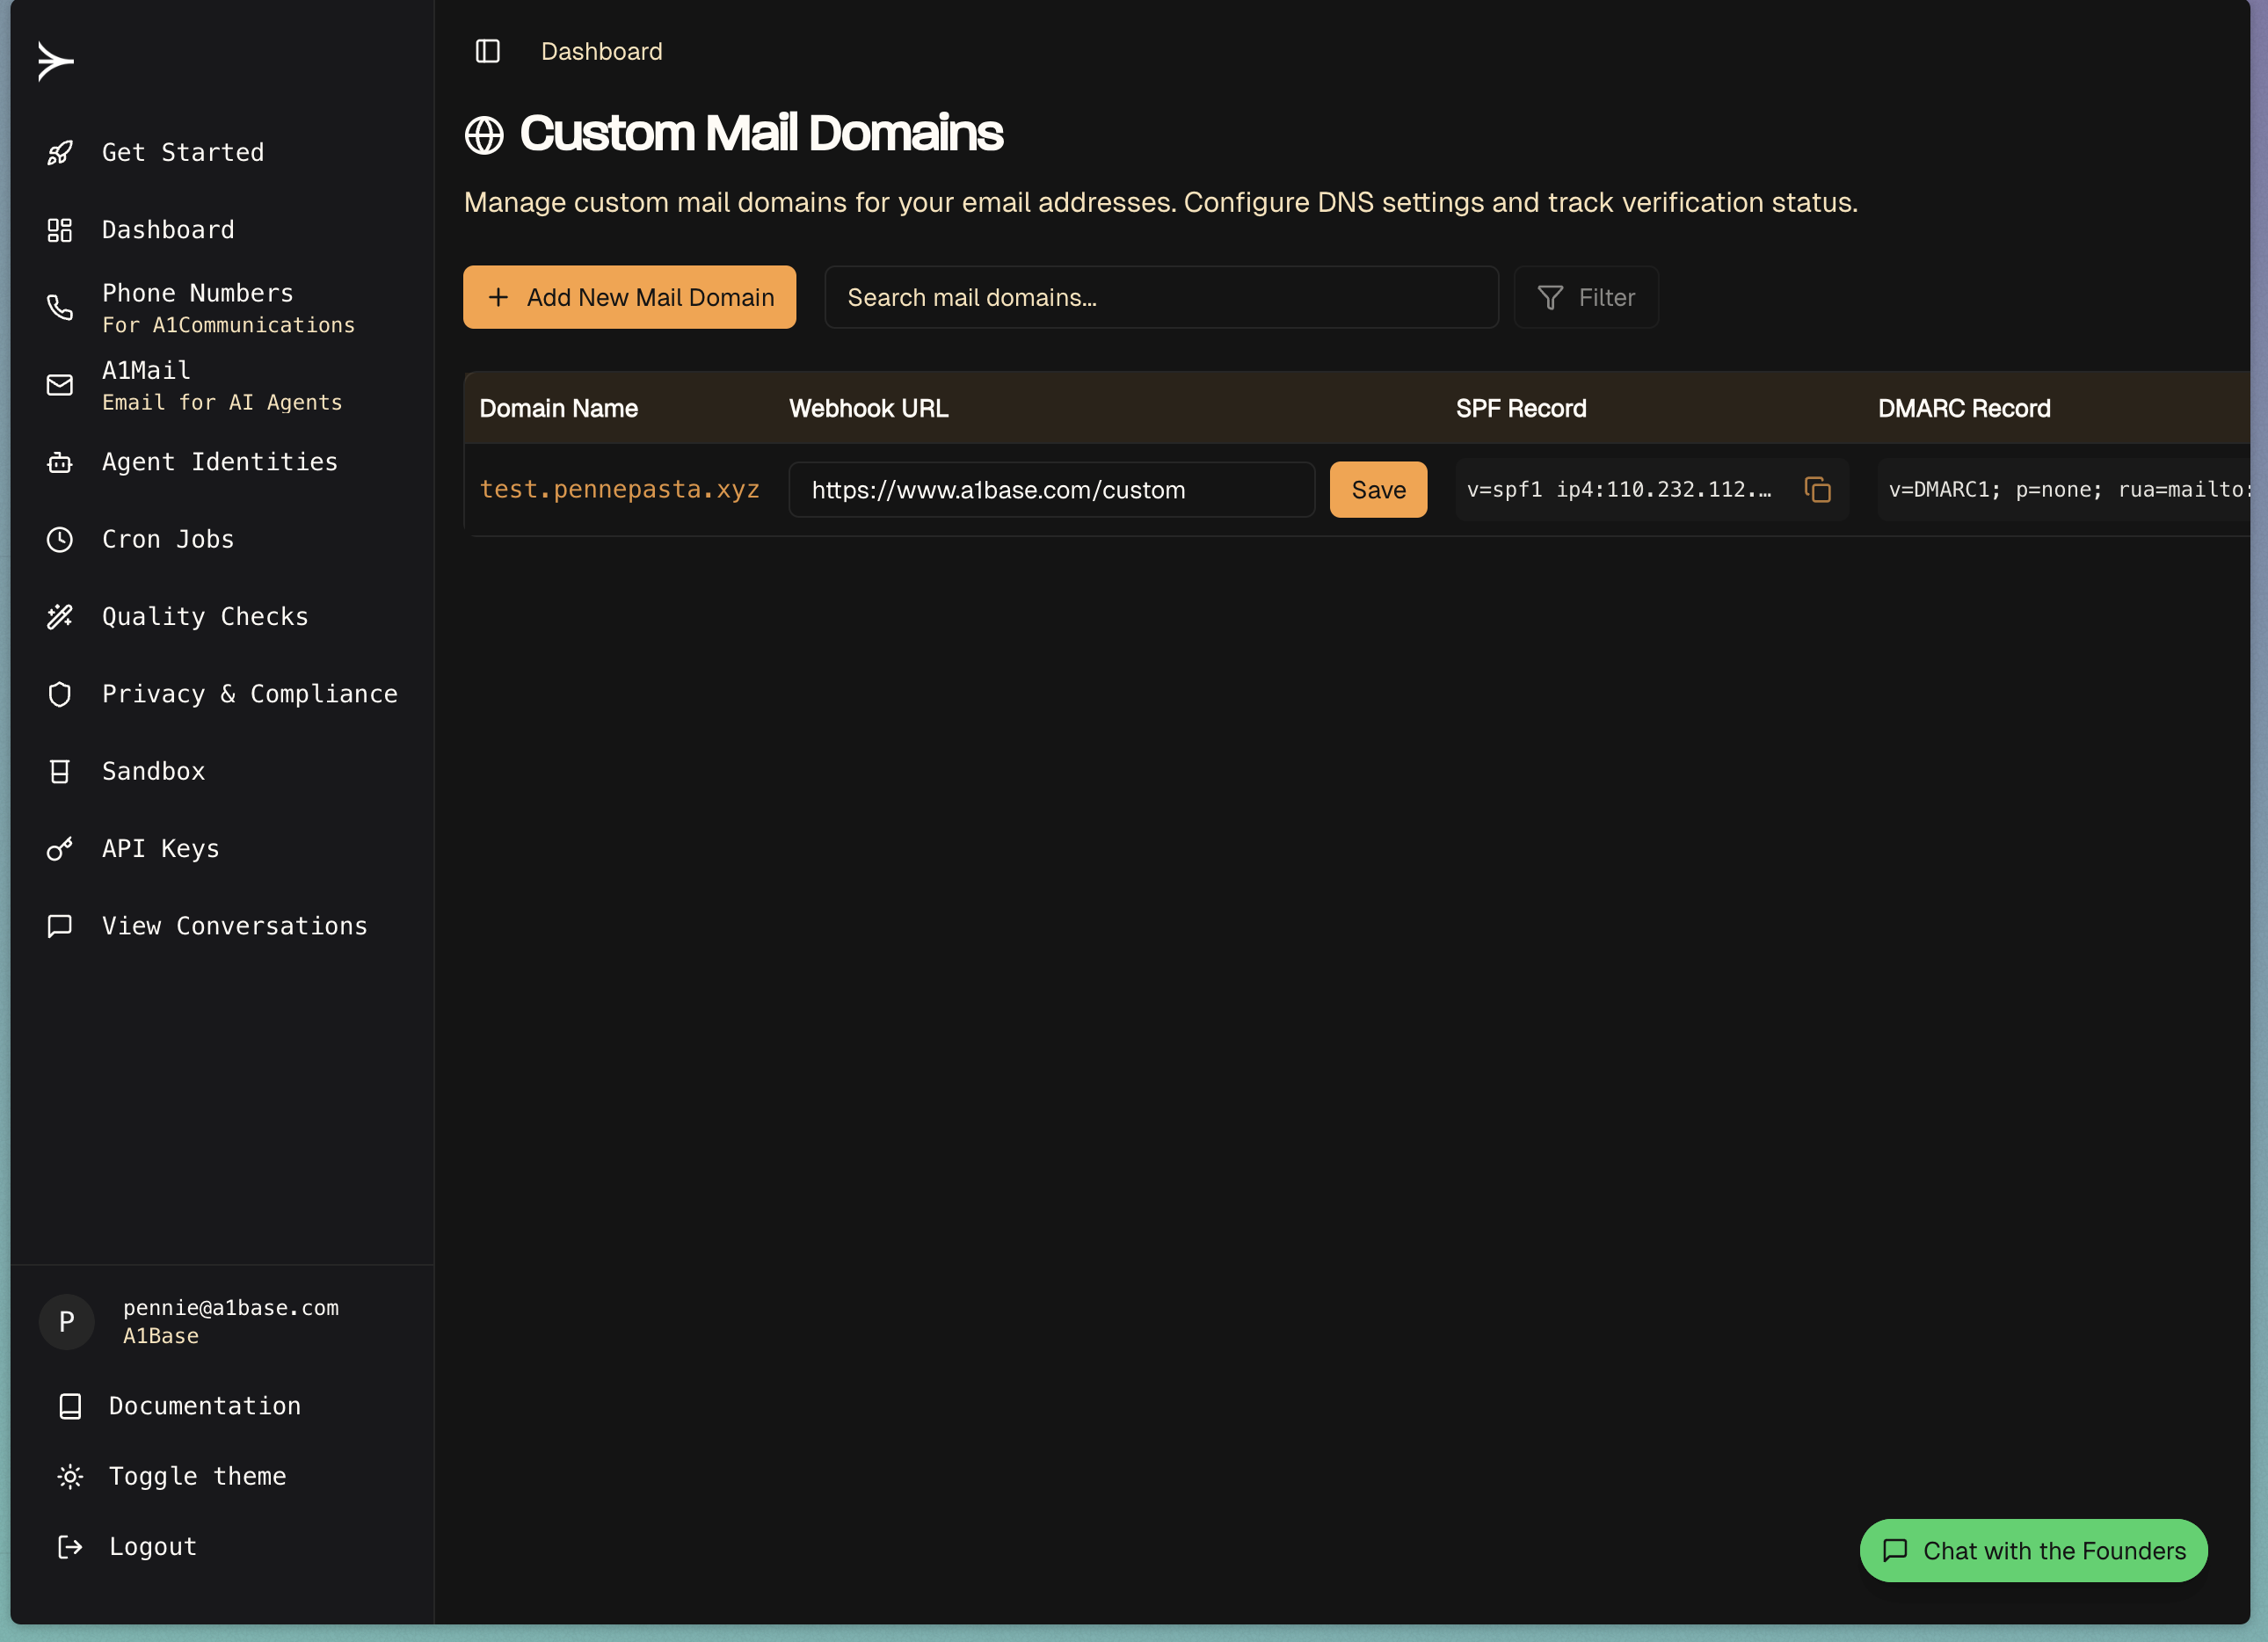
## Webhook Precedence
When an email is received, A1Mail will attempt to deliver it to a webhook in the following order:
1. Individual email address webhook
2. Custom domain webhook
3. Default webhook
If a webhook is not configured or returns an error, A1Mail will try the next webhook in the precedence list.
## 4. Test Your Webhook
Send a test email to your inbox and check if the webhook is receiving the email notifications.
## Webhook Payload
When an email is received, A1Base will send a POST request to your webhook endpoint with the following JSON payload:
```json theme={null}
{
"email_id": "a82b3e6b-dc79-46ad-9284-a166629592e3",
"subject": "Email Subject",
"sender_address": "sender@example.com",
"recipient_address": "your-address@a1send.com",
"timestamp": "2025-03-19T10:24:08.46083+00:00",
"service": "email",
"raw_email_data": "Full email content including headers and body"
}
```
### Payload Fields
| Field | Type | Description |
| ------------------- | ------ | ----------------------------------------------------- |
| `email_id` | string | Unique identifier for the received email |
| `subject` | string | Subject line of the email |
| `sender_address` | string | Email address of the sender |
| `recipient_address` | string | Your A1Base email address that received the message |
| `timestamp` | string | ISO 8601 timestamp of when the email was received |
| `service` | string | Always "email" for email webhooks |
| `raw_email_data` | string | Complete raw email content including headers and body |
## Verifying Signatures on Email Webhooks
To ensure the integrity and authenticity of incoming email webhooks, we sign the request using a symmetric-key HMAC (Hash-based Message Authentication Code). This allows you to verify that the webhook was sent by our system and that its payload has not been tampered with.
The signature is created using your unique `company_id` as the secret key.
You can find your `company_id` in the [A1Mail tab](https://www.a1base.com/dashboard/email-addresses) of your dashboard.
### How it Works
1. **Timestamping**: Each webhook request includes an `x-timestamp` header containing the Unix timestamp (in seconds) of when the request was created. This helps protect against replay attacks.
2. **Signature Creation**: We create a signature string by concatenating the timestamp and the raw JSON body of the request.
```
message_to_sign = +
```
3. **HMAC-SHA256**: This string is then signed using the HMAC-SHA256 algorithm with your `company_id` as the secret key.
4. **Header Inclusion**: The resulting signature is sent in the `x-signature` header of the request.
### Verification Steps
To verify the signature on your end, follow these steps:
1. **Extract Headers**: From the incoming webhook request, extract the `x-timestamp` and `x-signature` headers.
2. **Check the Timestamp**: To mitigate replay attacks, we recommend checking if the `x-timestamp` is recent (e.g., within the last 5 minutes). If the timestamp is too old, you may choose to reject the request.
3. **Prepare the Signature String**: Recreate the `message_to_sign` by concatenating the value from the `x-timestamp` header with the complete, raw body of the POST request.
> **Important**: It is critical to use the raw, unmodified request body. Any parsing or modification of the JSON before creating the signature string will result in a mismatch.
4. **Generate Your Expected Signature**: Using your `company_id` as the secret key, compute the HMAC-SHA256 hash of the `message_to_sign` you just created. The output should be a hex-encoded string.
5. **Compare Signatures**: Compare the `x-signature` from the request header with your generated signature. If they match exactly, the webhook is authentic and can be trusted. If they do not match, the request should be discarded.
### Example (Python)
```python theme={null}
import hmac
import hashlib
import json
def verify_webhook_signature(request_body_raw, headers, company_id):
"""
Verifies the signature of an incoming email webhook.
Args:
request_body_raw (bytes): The raw, unparsed body of the request.
headers (dict): A dictionary of the request headers.
company_id (str): Your unique company ID, used as the secret key.
Returns:
bool: True if the signature is valid, False otherwise.
"""
received_timestamp = headers.get('x-timestamp')
received_signature = headers.get('x-signature')
if not received_timestamp or not received_signature:
# Necessary headers are missing
return False
# 1. Prepare the message string
message_to_sign = received_timestamp.encode('utf-8') + request_body_raw
# 2. Generate the expected signature
expected_signature = hmac.new(
key=company_id.encode('utf-8'),
msg=message_to_sign,
digestmod=hashlib.sha256
).hexdigest()
# 3. Compare signatures securely
return hmac.compare_digest(expected_signature, received_signature)
# --- Usage Example ---
# Assuming 'request' is your web framework's request object
# company_id = "your_company_id_goes_here"
# headers = request.headers
# raw_body = request.get_data() # Use a method that gets the raw body
# is_valid = verify_webhook_signature(raw_body, headers, company_id)
# if is_valid:
# print("✅ Signature is valid. Processing webhook.")
# # ... process the webhook payload ...
# else:
# print("❌ Invalid signature. Discarding request.")
```
## Example Raw Email Data
The `raw_email_data` field contains the complete email including headers, which you can parse to extract additional information like:
* DKIM signatures
* Message ID
* Content type
* Email body (plain text and HTML versions)
* Custom headers
We'd love to hear from you!
Don't hesitate to reach out to [pennie@a1base.com](mailto:pennie@a1base.com) or [pasha@a1base.com](mailto:pasha@a1base.com) if there's any features you'd like to see or prioritised!